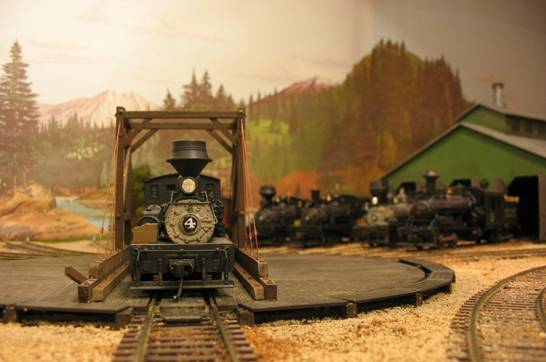
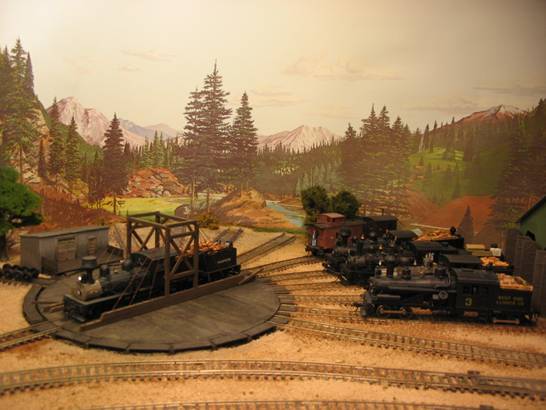
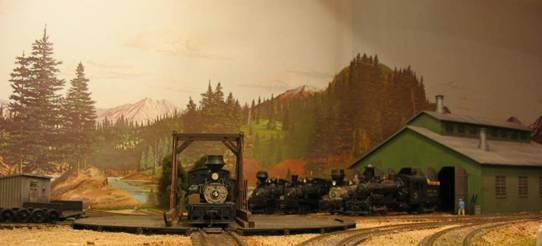
Turntable Gallows Construction
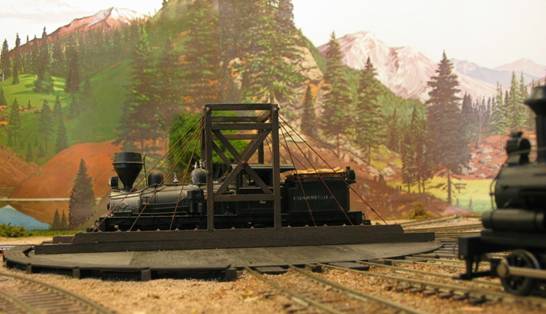
I based my turntable gallows on a plan in the book “The Pacific Coast Railway” by Westcott & Johnson 1998. I enlarged it to standard gauge size and checked to be sure it was big enough to clear my locomotives.
From that I went to the hobby store and bought lumber that was similar in size to the lumber in the plan. I’m an engineer so converting from full scale to HO scale was pretty easy. 87 to 1 scale. The big beams on the bottom are about 12”x14”. The truss structure beams are 10”x10”, 8”x12”, 7”x12” … some of the cross pieces 6”x12” and 6”x8”. You won’t be able to match exactly, so just get close.
I used the Atlas turntable with the motor unit. It is a brown color. I used alcohol and ink to weather it, but it is pretty dark. I tried to stain/paint the wood to match. I used floquil roof brown to paint the wood on the gallows. It was a reasonable match.
I used .015 wire because it can be used with Grandt Line turnbuckles (300-5039) which you can get from Walthers or a good train store. Also used Grandt Line nut-washer pieces (300-5096). Cut the bolts off close to the washer so you don’t have to drill deep holes.
I had to drill a lot of small holes for the wire and nut-washer pieces. Get yourself a good assortment of tiny bits and a pin vise.
I had a hard time getting the wood to glue to the plastic turntable. Make sure to leave the bottom of the wood beams that sit on the Atlas turntable unpainted. I think I used Testors “cement for metal and wood models”. I had to glue and reglue it several times and used small weights to hold the wood in place. Be sure to keep everything flat.

I used scrap plastic from MDC roundhouse gondola sides to cover the unused stalls with a walkway. You could use scrap lumber. I was tempted to try to cut away the large “spacers” that Atlas built up between the tracks, but decided not to risk destroying the turntable. I painted these spacers roof brown so they don’t show so much.